Ondawa Jumper


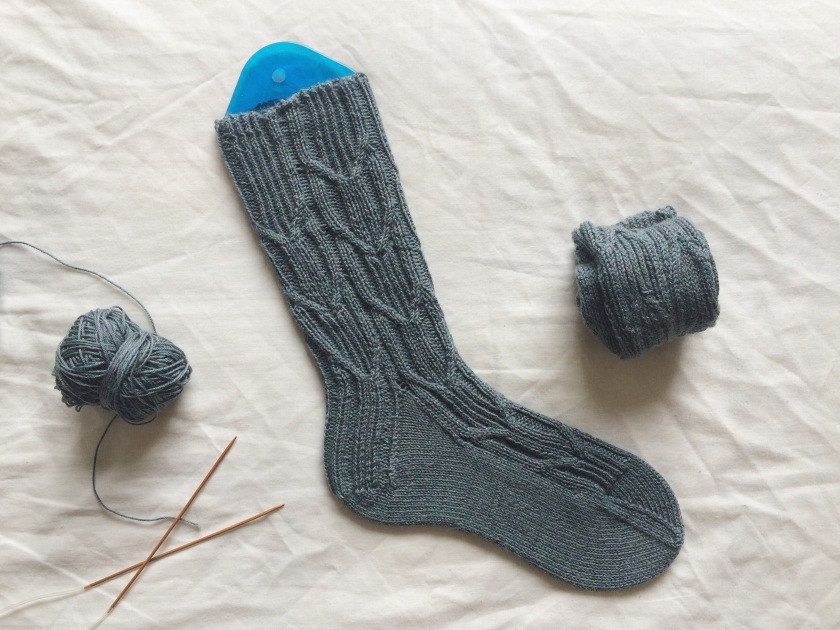
It has been a while since I knit a jumper, or even anything on a similar scale. Last year I think I knit almost exclusively socks! I had definitely caught the bug. So when I started the Ondawa jumper (designed by Michelle Wang for Brooklyn Tweed) I was not really in the right frame of mind to just go marching right in, which is exactly what I did. A tip from mum: read through the pattern first.


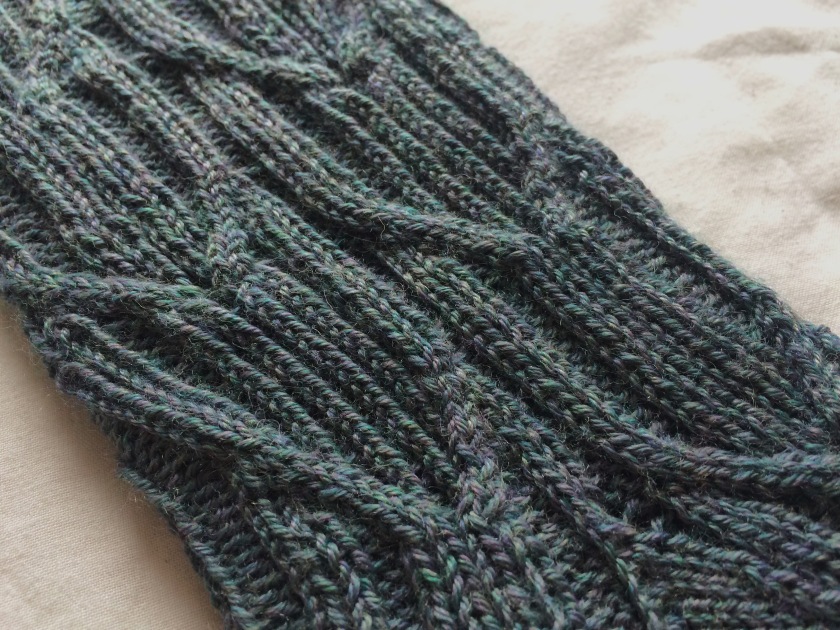
The pattern, if you don’t know it, is fairly complicated. There’s a lot of different cables and twisted stitches going on, sometimes at the same time. So you have to pay attention, at least until you’ve got the hang of it! I didn’t help myself here by watching old episodes of Gilmore Girls.

The hem went fine, it was just when I got to the main pattern that I started making mistakes. So you know all that sock knitting I did, it was all in the round. So was the hat I made earlier this year. Ondawa is knitted straight. I totally forgot that everything has to be reversed when knitting the wrong side, even the order of the charts (I know, seems obvious, right?). There I was, happily knitting away and completely confused about why I couldn’t see the pattern coming through…time to frog.

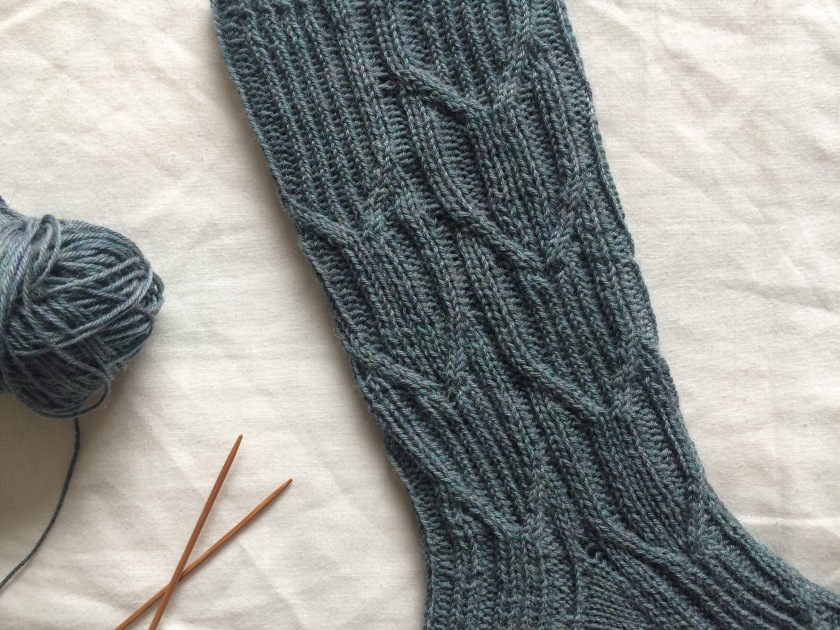
Now that common sense has returned to me, it seems to be going well. I have the odd cable going the wrong way, probably when Lorelai did something particularly entertaining – which is most of the time.


To continue without frustration I just need to make sure I make a note of what row I last finished on, a task I have helpfully neglected several times already, and which I have just remembered I’ve done again… That and watch my measurements, as my row gauge is a tad off. Now that I’ve gone through the chart a couple of times it feels a lot more natural, and I can spot mistakes easier! Just another four inches until the next stage, and I’ll update you on the progress later.

Sock Knitting – Dawlish by Coop Knits

If you follow me on Instagram you will know that these socks took me a while to knit. In fact, looking at my uploads I started these around the end of March! A couple of weeks ago I finally finished them, and whilst I’ve already excitedly shown them off on Instagram, I wanted to go into a bit more detail here.

img_3379

The pattern is called Dawlish, and is the first pattern in Coop Knits Volume 2. I would highly recommend the book and the other patterns Rachel Coopey has released. She also has her own yarn, called Socks Yeah! which is what I used for this pattern. Note that it’s not the yarn the pattern was designed for, as I assumed when I bought it, I should have looked at the pattern!

img_3377

As you can see, the design is beautiful. All those interlocking cables and ribs create a lovely streamlined pattern. I also love the idea of using a ktbl (knit through the back loop) rib, which creates a much tighter look and is a nice contrast to the normal rib. I hadn’t come across it before but I’ll definitely be using it in the future!

img_3376

The pattern is very easy to follow, my only mistakes were when I had miscounted or ripped back and had forgotten to untwist the ktbl stitches. It was possible to knit without the pattern for a short while too as I found out when I left the chart behind one day (whoops!). You can quite easily follow where the cables come in once you are familiar with the pattern.

img_3378

I knit these using the magic loop method on circular needles, because I had only used dpn’s before and I wanted to try it out – there will be a post coming up comparing the two techniques soon. At first I really struggled to get going, but the beginning is always the hardest. After youtubing a way to avoid the gap at the join I slowly got the hang of it. I did accidentally pull the needle out too far a couple of times though!

As I said at the beginning, I didn’t use the yarn the pattern was designed for, and so my tension was a little off. Not too much though, so I carried on. The result is that my socks are a little longer in the leg than I think was intended, but they still fit beautifully. Now I just need to wait for the weather to cool again so I can wear them!

Knitting Equipment – Part 2 for Established Knitters

Because you can never have enough things for knitting!

I’ve talked about the basics, but knitter’s acquire tools as easily as yarn. Well, maybe not quite that easily!

What do more advanced knitter’s find useful? As I spoke about in my previous post, it depends on what area of expertise you focus on, though there are a few general things too. I’ve shown some examples for the first two points from Etsy – there is so much choice on there for knitting accessories!

1. Yarn Bowl

Something I have yet to purchase, although I’m not sure that will take long after this post. Yarn bowls come in all shapes and sizes, and are designed to keep that pesky ball of yarn from rolling all over the place. Holes in the bowl allow you to thread your yarn through, and you’re good to go! A solid base is helpful to keep the bowl in place, and you want to make sure the holes are as smooth as possible, especially if it’s made of wood. Even the slightest rough patch will cause your yarn to catch. Here’s a few examples:

This cute bowl by Lochbroompottery with hare’s in the middle.

il_570xN.890170510_13ya

This foxy bowl by Barruntando

il_570xN.611481214_8x2v

And this typographic bowl by LittleWrenPottery

il_570xN.527168242_8g5y

2. Knitting Markers

These come up in lots of patterns to help you pin point a particular spot in your knitting, and can be very useful for complicated patterns. They also come in all sorts of shapes, you have your boring ring clips (which I have), but you can also get lots of lovely looking charms, which have the bonus of making your knitting look extra pretty.

Sea themed mermaid markers by TheMerinoMermaid

il_570xN.957479386_b7mv

A happy looking sheep by MyNeedleCrafts

il_570xN.882468780_sjg3

And of course Harry Potter markers by thimbleandthreadmake

il_570xN.981833310_m91r

3. Stitch Holders

These come in most useful when knitting jumpers. They allow you to hold a section of knitting whilst you carry on with a separate part. They’re pretty basic, without much variation. If you don’t have them, I know a lot of people just thread through a scrap bit of yarn. Job done!

4. DPN’s

Double pointed needles are sold in sets of four or five, and are a  way of knitting in the round. People usually have a preference for either circular needles or DPN’s (look out for a post in the future comparing the two!). They are used for knitting socks, sleeves or hats, or anything else small that you want to knit in the round, and not seam the edges. The main annoyance I have with these is that the ends stick into your hands and they can be quite fiddly.

5. Circular Needles

These needles come in different lengths for different projects. You can buy interchangeable versions which saves buying needles of the same size, but with a different length. The only downside to this is that they can be pricey. The length is measured from tip to tip, and if you have a needle that is longer than you need, you can use a technique called the Magic Loop method which can come in very useful!

So thats a quick break down of some equipment you might use. If I can find anything specialised or particularly unusual I may do another post! If you have any questions, just let me know.

What to Knit in Summer

When it’s too warm to be dealing with chunky yarn, try some of these ideas instead!

Nearly the end of May, and we are definitely getting into the summer season – not that the British summer lives up to the name. Even so, knitting is not really associated with this time of year. You can’t really get excited about cosy cables and chunky scarves when it’s hot! But that’s the thing, there are plenty of designers out there creating beautifully light knits perfect for those summer days. Here I’ve put together a bit of inspiration and some tips to get you going.

Inspiration

Helmut Lang Spring 2013 Gem Davis Design
Helmut Lang Spring 2013

Acne Studios Marcy Moulin Basic sweater Gem Davis Design
Acne Studios Marcy Mouline
 

Springtide Poncho Anthropologie
Grace Hamilton Jewellery - Gem Davis Blog
Jewellery by Grace Hamilton 
Top Tips
  1. Use cotton yarn – much more breathable and so it feels cooler to wear
  2. Try out some lace patterns, all those holes will let the breeze through!
  3. Make some smaller projects, like accessories, so they don’t feel heavy in your hands
  4. Be wary of white yarn – I’ve had to unknit and discard some white yarn as it got stained from the suncream left on my hands!
Patterns

Odele Top by Amy Christoffers

Odele Top by Amy Christoffers - Gem Davis Blog


Nyanen Tee by Cecily Glowik MacDonald 

Nyanen Tee by Cecily Glowik MacDonald - Gem Davis Blog

Sheer Top by Rowan

Sheer Top by Rowan - Gem Davis Blog


Abricot by Rachel Coopey

Abricot by Rachel Coopey

So hopefully that’s given you some inspiration for the coming months! 

Learning to Spin Wool

As my knitting interests develop I’ve become more into using real wool, in particular british wool. There is nothing better than diving into a yarn fair full of indie dyers and spinners who are producing yarns of fantastic quality, and you know exactly the journey it’s been on.

I had been starting to think that learning to spin would be a fun new addition to my skills, but it wasn’t until the Yarn in the City yarn crawl last September that I really wanted to learn how to do it. The leader of our little gang of knitters (I’m sorry, I really can’t remember her name!) had her drop spindle with her which would be whipped out on every tube journey as everyone peppered her with questions and looked on in awe.

Last Christmas, much to my delight, my parents gifted me with my very own drop spindle and some wool to start with.


I’ve begun teaching myself using youtube. I don’t really have much idea what I’m doing yet, but I’ve certainly improved in a short space of time! Though when I haven’t done it for a while it takes time to get back into it, so this first bit of yarn is likely to be unusable…


It’s amazing to see all the separate little fibres suddenly twist into yarn. The most annoying thing I’ve found is when the fibres break, it’s taking some practice to make the join smoothly and not with a great lump of wool. I’m sure there’s something about how tightly it’s twisted that I should know, but there’s probably a lot of things so I should really read up about it a bit more.


The technique, as far as I can see is quite simple. Once you’ve got the initial twist on your scrap yarn you just slowly pull apart the fibres, making sure to keep a tight pinch at the end of the twisted yarn. When you’re satisfied with the thickness, just transfer the pinch up and continue. Obviously if you’re looking to learn how to spin this post isn’t much use, just go on youtube and there are lots of videos – maybe when I’ve perfected the technique I’ll do some of my own!